Functions Quiz and Twine Chapbook
When it is time to take the quiz, the Quiz link will be written on the board. Enter the quiz code in the text field below and click "Submit".
Preparing for the next interactive story project.
The Twine system for making interactive stories can be customized with different story formats. Twine comes with four story formats, and it is also possible for people to program and add new ones.
When we learned Twine in February, we used the default story format, which is called Harlowe. For the next project, you will use the Chapbook story format.
I first learned Harlowe because it is the default format. However, after seeing the class work with Harlowe and learning about Chapbook, I thought Chapbook would make it easier for you to make better stories.
The look of Chapbook stories is different from Harlowe. You can see a Chapbook version of Island Adventure here.
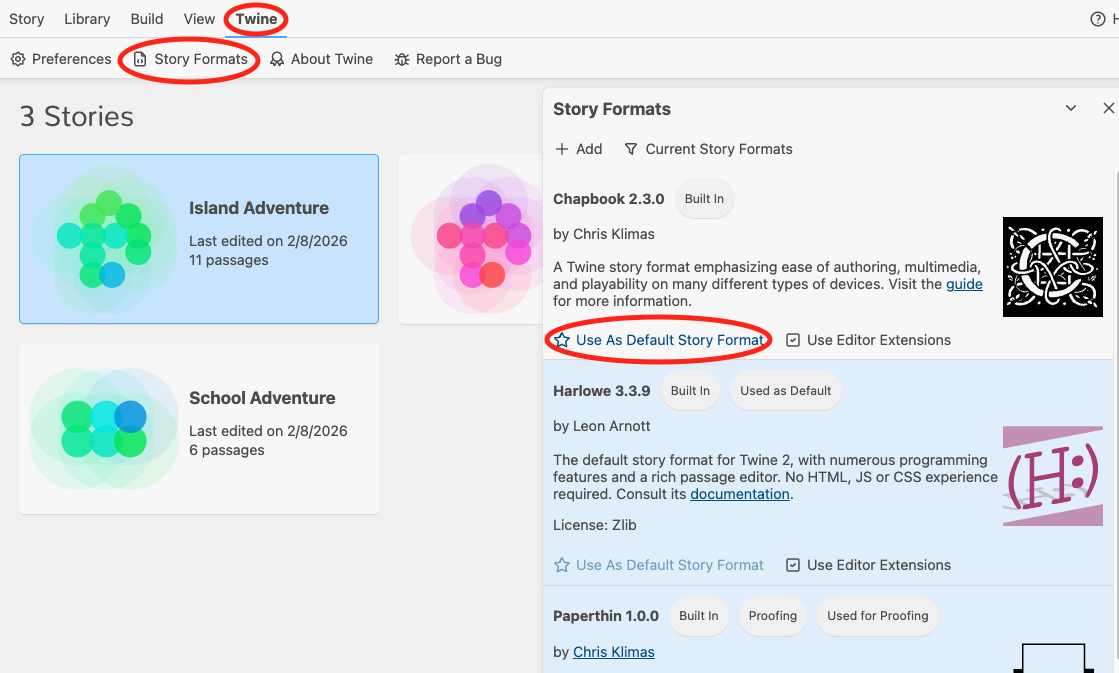
The easiest way to use Chapbook is to set it as the default story format. Run Twine, click the Twine menu, and choose Story Formats. You will see a list of story formats on the right, with Chapbook at the top. Click Use As Default Story Format under Chapbook. Now when you create a new story, it will use Chapbook.
Click on the Story menu in Twine and then click + New to create a new
story. Give your story the name lastname Twine2.
You will then be taken to the Story Editor, which allows you to create
and link passages, shown as boxes with lines connecting them.
Double click on a passage to edit it. You will see that the menus for the Chapbook passage editor are a little different from Harlowe. The Style menu will give you some different text styles that you can use.
When you select a style, special symbols called markup are inserted into the text to indicate the style. You can type these markup symbols directly and get the same result. To learn more about formatting in Chapbook, see Text Formatting in the Chapbook Guide.
Simple links are done the same way you learned before in Harlowe, either
by putting the name of the passage you want to link to in double square
brackets, like [[Dungeon]], or by providing other text,
followed by an arrow and the passage name, like
[[Go through door->Dungeon]].
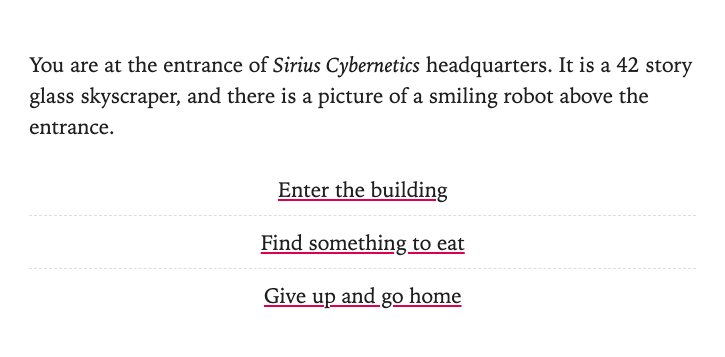
Since interactive stories often present several choices of what to do
next, Chapbook has a special way to present these choices, called a fork.
You code a fork by putting each link on a separate line with
> in front of it.
You are at the entrance of *Sirius Cybernetics* headquarters. It is a 42 story
glass skyscraper, and there is a picture of a smiling robot above the entrance.
> [[Enter the building]]
> [[Find something to eat]]
> [[Give up and go home]]
When you click the Test From Here button, you will see a gray panel at the right side of your window, called the backstage view. It provides tools to help you better understand how your story works. The backstage view is only shown when testing.
There are four tabs at the top of the panel. We will cover the State and Style tabs later, but first look at the History tab. As you go through a story, the History tab shows all of the passages you have been to. You can click on a passage name to rewind back to that point.
The Notes tab lets you record notes as you test your story. You can make notes on things that need to be fixed or ideas of what you want to add.
You know enough now to get started with a new story using Chapbook. Follow the instructions above and begin experimenting with your own story.